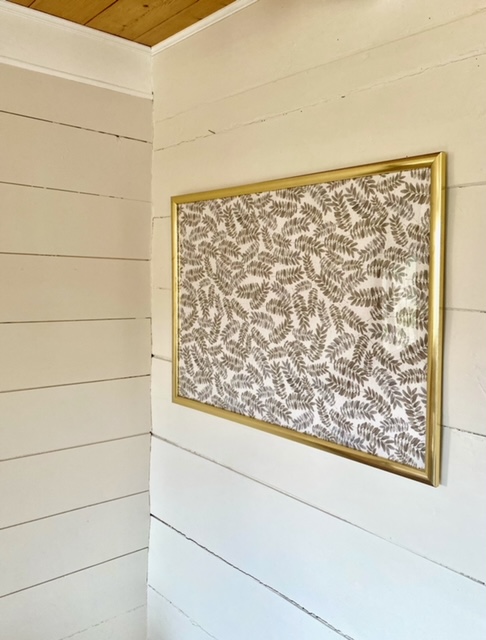
In today’s blog post, I am sharing the details of a modern DIY home decor project I recently did. It’s a super simple and affordable wall art idea that makes a big statement. I’ll probably end up making more of them to hang around my house because I adore how it turned out!

I love DIY projects because they are usually super budget-friendly. With just a few simple materials, it is possible to create some pretty expensive-looking home decor!
In this blog post, we are diving into the details of how I created a stunning piece of wall art in barely any time at all.
Modern DIY Wall Art

The Materials You Are Going to Need
This piece of DIY wall art is super easy to make. I spent a maximum of 10 minutes on it, and I already had everything I needed at home.
Here’s what you’re going to need:
- A thin piece of fabric that you love the color or pattern of
- Fabric scissors
- A picture frame
- Glue
- Iron (optional)
That’s it! The most important thing to think about is that your piece of fabric has to be larger than your picture frame. Other than that, it’s entirely up to you how large or small you want your wall art to be.
You also need to consider the thickness of the fabric. If it is too thick, it will be difficult to fit in in the picture frame.
I had a large gold-colored frame lying around at home, and I never knew what to do with it. I also used to be a sewing girl (but it’s been a while since I touched my sewing machine). There was tons of scrap fabric lying around in my home office.
So I grabbed my gold frame, a pretty piece of fabric, scissors, and glue, and got to work.
Instructions
1. Measure and Cut
If you don’t already know the dimensions of your picture frame, go ahead and measure its length and width.
Next, you are going to grab your piece of fabric and cut it so that it is 5 cm wider and 5 cm longer than your picture frame.
If your piece of fabric has some wrinkles or creases, it is a good idea to iron it so that it is completely smooth.
2. Add Fabric to the Picture Frame
The next step is super simple.
Open up those tabs on the back of your frame (apparently they’re called turn buttons), and take out the back of the picture frame like you would do if you were adding a picture.
Instead of putting a picture in your frame, wrap your fabric around the back of the picture frame. Make sure it is smooth, then secure it to the frame using the turn buttons, like you would if you were putting a picture in a frame.
This might hold your fabric in place. For mine, it needed some extra securing, so I went ahead and glued the folded over pieces of fabric to the back of the picture frame.
3. The Finished Result!
It’s really that simple! I love how the fabric looks behind the glass of the picture frame. It is a little different than a painting or a poster. A unique piece to display on a boring wall.


This blog post has been all about this simple DIY modern home decor idea. I love how my fabric wall art turned out and I’m sure I’ll use this trick again in other areas of my home that need a little extra accessorizing.
Looking for more DIY ideas? Check out all my other DIY home decor blog posts here!